Once you’ve finished your registration as a Team member, you will be taken to your Dashboard.
Let’s go over the menu and settings.
Dashboard Menu #
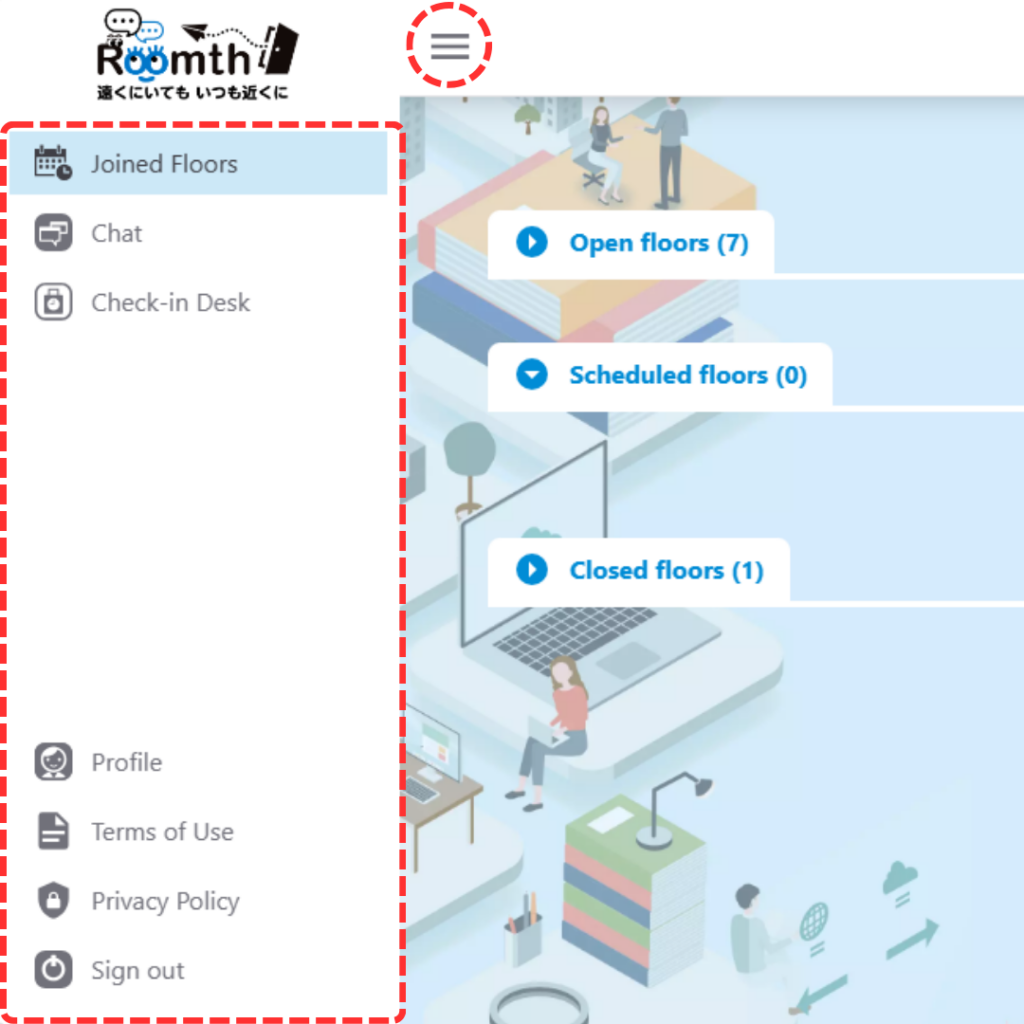
Joined Floors Overview: #
A list of all the floors you can access.
Hit the three-dot icon (top-right of each floor tile) for options:
-Enter the floor
-Edit floor details*
-Duplicate floor*
-View floor details
-View recordings*
-Grab the invite link to share*
-Delete floor*
* These options require admin privileges. Ask one of your Team’s Admins to grant you these privileges if you think you should have them.
Chat: #
You don’t need to enter a floor to chat! Connect with colleagues here, with group or one-on-one chats.
Right-click a user’s message to reply.
Right-click a message you have sent to either edit or delete it.
Check-in Desk: #
Use the Check-in Desk to track your working hours or stay up to date with shifts and schedules.
Tap “Check-in” when you start working, “Break” when you need it, “End Break” to jump back into action, and “Check-out” to sign off. On the left, you can check on teammates’ status and today’s shift details.
Shifts are connected to the Team, not a floor, so you can travel between floors freely and your time will still be accurately tracked. Just don’t forget to tap “Check-out” at the end of the day, before you sign out!
Profile: #
Preview and edit your user profile: name, email, password, and your Profile picture.
You can also check your account type on this menu.
Dive into the “Team Information” tab to see your Team’s official details like name and logo.
You can also access your profile at any time, by clicking your icon on the top right of your screen.