explain floor plan, moving, changing names
This is your Icon. By default, it’s the first letter of your name and a randomly assigned color. You can change it anytime in your profile settings. (link to profile settings how to)
Click and drag the map to look around, and use the mouse or trackpad to zoom in and out.
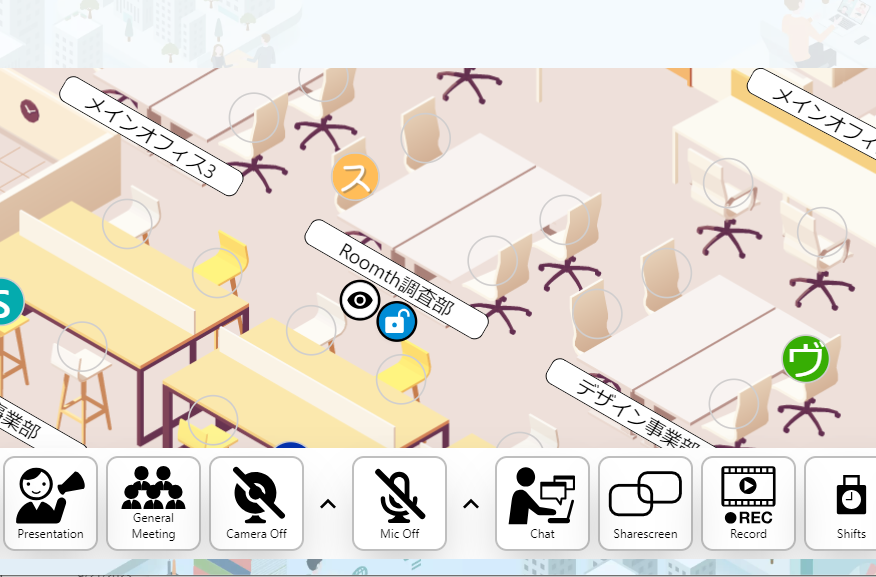
Every seating area on the map has a nameplate, and each seating area has a limited number of seats. You can click on any seat to move there.
Found your table? Let’s name it!
Click on the nameplate and select the eye icon (view).
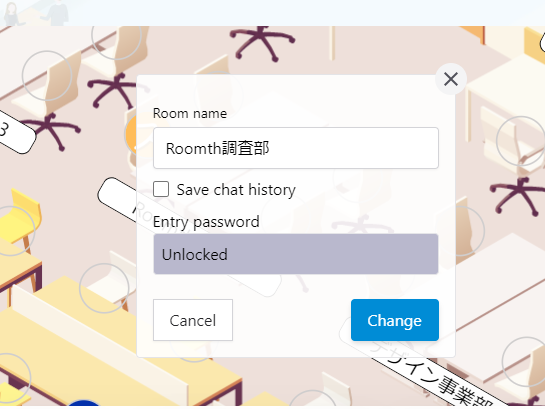
Here you can change your Table/Room name to anything you’d like!
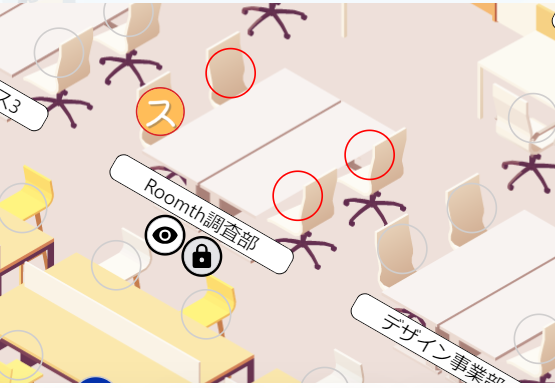
To lock your table/room, click the nameplate and select the blue “lock” icon.
You will hear a lock sound and all the available spaces will change color to red.
After locking your table/room, click the view icon again to set a password. By doing this, you have now created a private area where only people with the password can enter.
Any users who try to enter your table/room will be asked for the password.
Interacting with colleagues? They’ll hear a knock. If someone approaches you, you’ll hear it too.
Invite peers to your zone by right-clicking and selecting “Invite to”.
Turn on your camera or mic and only those at your table can see/hear you. Screen sharing also follows this rule.